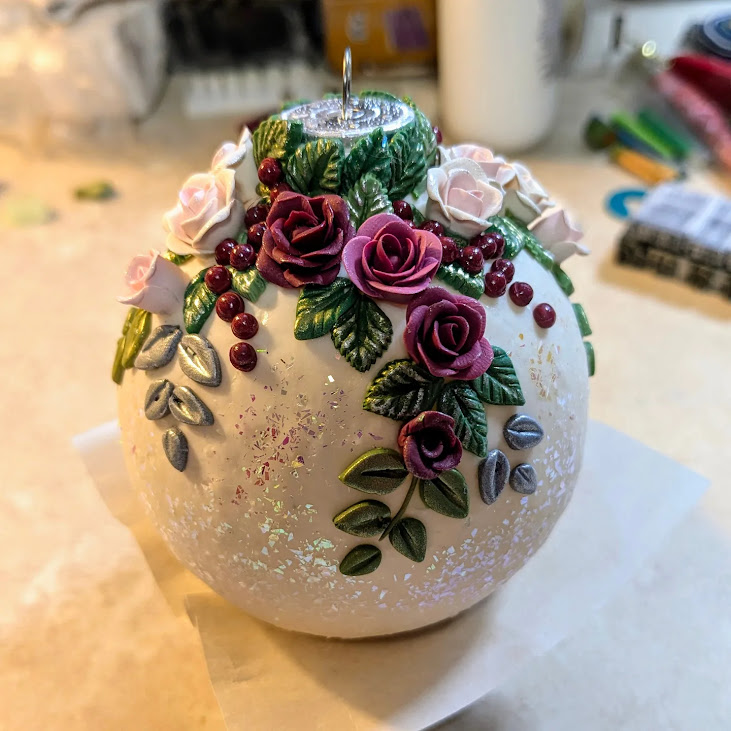
Creating a First Married Christmas ornament with tiny roses, polymer clay, and a few lessons learned along the way.
No groundbreaking techniques this time- just a happy excuse to play with clay and to try my hand making tiny roses. Two dear friends recently got married, and I finally solved the age-old puzzle of what to give the couple who already has everything: a handmade, personalized ‘First Married Christmas’ ornament in their wedding colors.
As with most of my projects, the first attempt wasn’t the attempt. I ended up making four ornaments before deciding that two were worthy of gift status. The other two graciously accepted their fate as learning experiences.
The names were impressed using genuine lead “hot type” printing stamps—the same kind we used decades ago to print maps on a press at the map company. It seemed fitting to add a little piece of my own history (something old, haha) to commemorate the beginning of theirs. –MJB
Materials: Premo! and Cernit polymer clays, mica powder, chameleon flakes, glass sphere, and wire.
How tiny magnets turned my cutter chaos into a display of tiny creative treasures.
Every once in a while, a studio organization idea works so well that it deserves to be shared. This is one of those ideas.
I make a lot of hanging mosaic-style and Scandinavian folk art-style ornaments, which means I use the same tiny clay shapes over and over again. I sketched a page of the shapes I wanted, and my talented friend, Kim Day, transformed them into beautiful 3D-printed cutters and matching stamps. Beautifully sharp cutters. Many of them are just a centimeter- and even smaller.
That was wonderful…until I actually tried to use them. The little cutters were constantly lying on my worktable with the cutting edge hidden. Finding the right one meant picking up four or five before discovering the shape I was looking for. There had to be a better way. Then the light bulb came on.
I bought tiny neodymium magnets (4 mm × 2 mm) and attached one to the back (the pushing side) of each cutter with two-part epoxy. Once the glue cured, I mounted them on a piece of magnetized sheet metal standing upright beside my workspace.
Problem solved.
Now every cutter is displayed with its cutting edge facing me, so I can spot exactly the shape I need in seconds. They stay organized, take up almost no bench space, and are surprisingly satisfying to look at. Best of all, there’s still plenty of room on the magnetic board for the rest of my ever-growing collection of teeny-tiny cutters.
Sometimes the best studio tools aren’t the expensive ones—they’re the simple solutions that make creating just a little more enjoyable.
A Few Tips (Learned the Hard Way)
Skip the tiny batches of two-part epoxy. I mixed several little puddles of epoxy, grabbed each magnet with tweezers, dipped it in glue, and stuck it onto the back of the cutter. It worked…eventually. A fine-tip bottle of strong adhesive is much faster, much cleaner, and far less likely to leave you wearing the glue instead.
Give your magnets some personal space. Arrange your cutters and stamps well apart while the adhesive cures. If they’re too close, the magnets will suddenly decide they’ve found their soulmates and slam together. You’ll spend the next few minutes prying them apart and starting over.
Put the metal tweezers down. Seriously. Use plastic tweezers or, better yet, your fingers. Neodymium magnets have a remarkable talent for convincing metal tweezers to abandon their job and join the magnets instead. Most of us insist on trying metal tweezers exactly once. After that, the lesson tends to stick.
Like many good studio hacks, this one was perfected through a combination of experimentation, stubbornness, and just enough mistakes to make it memorable. –MJB
Giving an old cephalopod eye cane new life with a little wirework and a fresh perspective.
Every once in a while, something hiding in the back of the studio decides it is ready for a second act. These cephalopod eye cane beads had been patiently waiting in my stash for their moment to shine. Apparently, they were not forgotten- they were simply in retirement. A little new hardware, some sculptural wirework, and a fresh finish transformed these forgotten cane experiments into finished wearable pieces.
Cephalopod eye canes are one of those polymer clay techniques that look intimidating but are wonderfully rewarding. Layers of polymer clay are shaped, stacked, and reduced to be sliced and reveal a tiny cross-section of the design- almost like discovering a miniature underwater world hidden inside the clay.CorvusFlies (Melanie West) has a great tutorial on Etsyif you need a refresher.
For these pieces, I paired the old cane slices with a little wirework. Adding gunmetal wire gave the beads structure and movement. Sometimes an older piece of clay doesn’t need to be remade—it just needs a different way to be seen.
I also finished the beads with what has become a staple to my polymer clay studio: Eastwood automotive powder coat. Traditionally used to create durable finishes on metal parts, powder coat adds gorgeous gloss and dimension to polymer clay pieces with no VOCs. Products such as theEastwood HotCoat powder coat I use can be applied (carefully) to cured clay and ‘cured’ again with a heat gun (did I say ‘carefully’?) creating a unique surface effect that wears like a tiny piece of industrial art. I’ll make a video tutorial about how to use it because its fantastic and everyone should experience this magic at least once in their lifetime.
The combination of organic cephalopod eye patterns, mechanical-looking wirework, and a little automotive-inspired shine seemed like the perfect pairing, right? A bit ocean, a bit steampunk, and a bit “what else can I put on polymer clay and see what happens?” –MJB
Here are my entries for the NWPCG Artist’s Swap that happens at the end of May; Steampunk Honeybees. The theme is “Things with Wings”– a wonderfully open-ended invitation to let imagination take flight.
I created one base and made a (Shore 40A) silicone mold of it to help streamline my process and have more fun with the personalization of the pieces. I jumped down the proverbial rabbit hole with this one. Each steampunk honeybee and base includes Cernit and Premo! polymer clays along with mica powder, tiny metal gears, UV resin, watch parts, colored foils, magnets, and, as always, a generous helping of patience. Because sometimes the smallest details require the most time, the tiniest tools, and a willingness to be a clay whisperer when the clay that has other ideas. –MJB
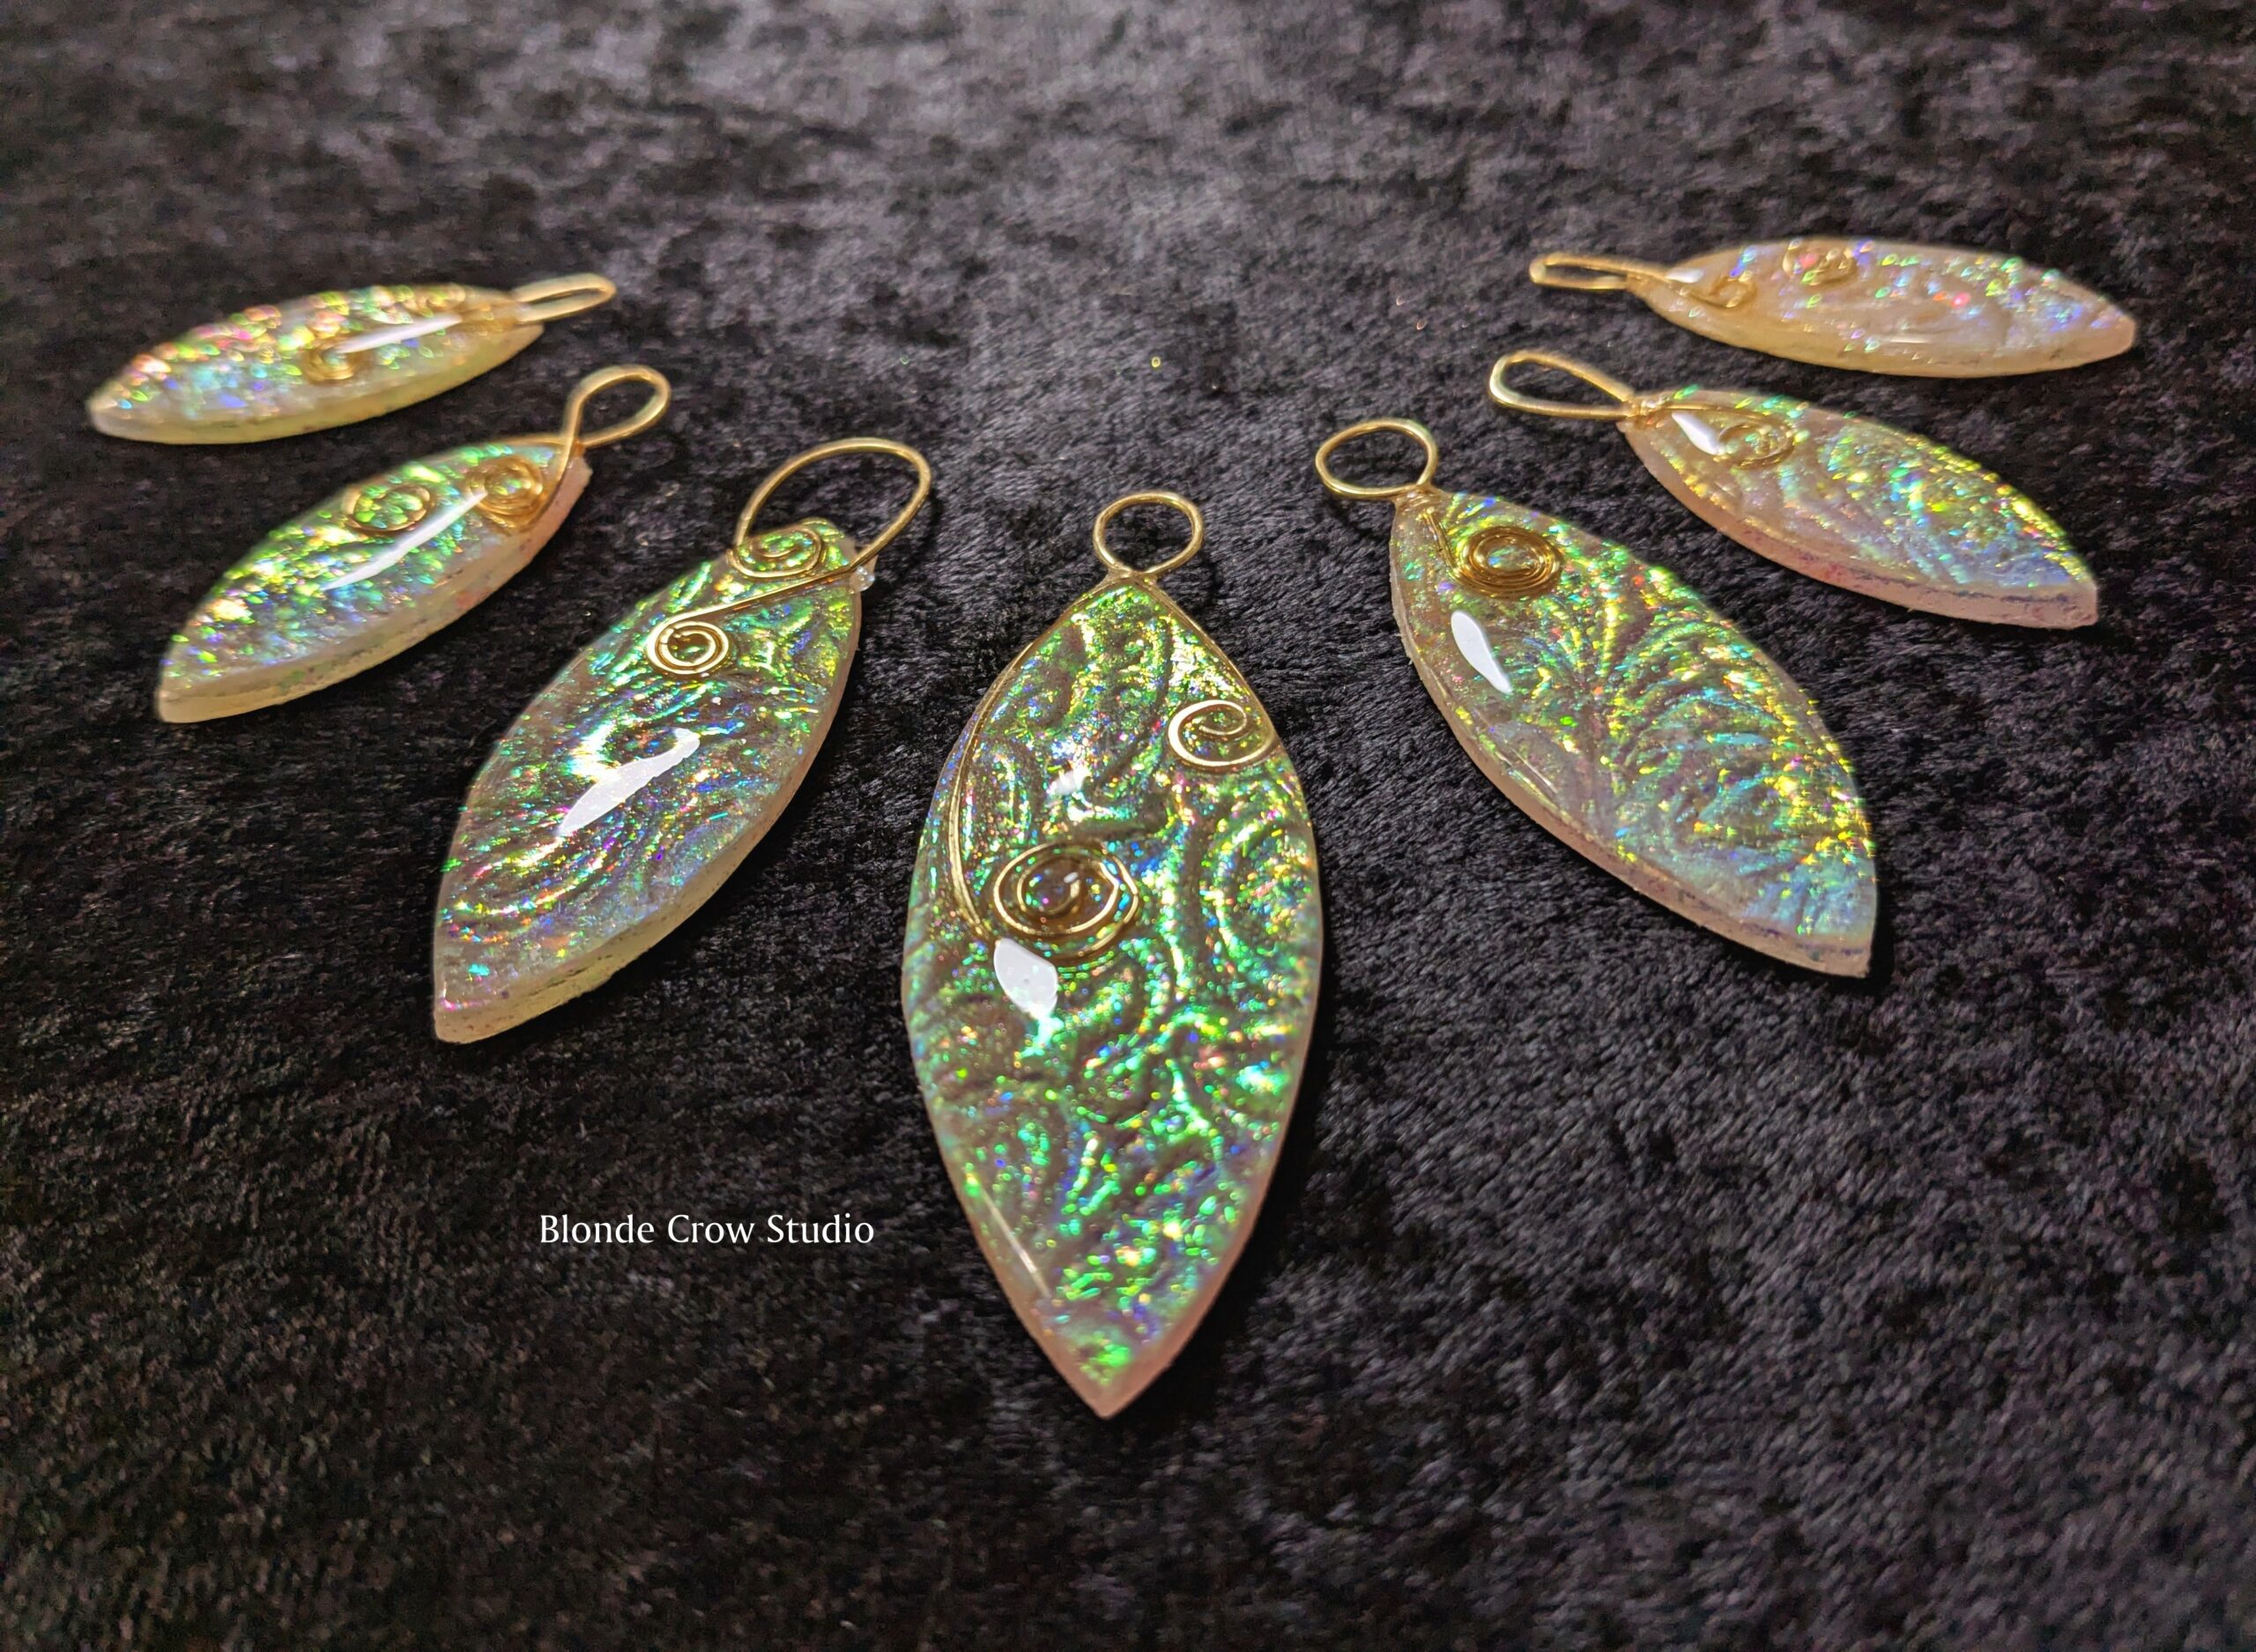
I’ve created the best and easiest polymer clay faux dichroic glass you’ll ever make. Seriously. Forget exclusive or expensive materials and alcohol inks that lose their spark over time. Follow my technique for creating show-stopping faux dichroic glass that uses… basket-wrapping cellophane! Yes, my polymer peeps- simple, the-cheapest-you-can-find iridescent cellophane holds the magical secret. I’ve done all the experimenting so you don’t have to! In the end, I used polymer clay, a bit of liquid clay, cheap iridescent wrap, and a swipe of UV resin for a brilliant, believable faux dichroic glass.
Before I ever created these faux opals, I fell headfirst into a worldwide opal rabbit hole. I studied gems from Australia, Ethiopia, Mexico, and beyond, searching for the secret behind those impossible flashes of color. But I kept returning to the opals of Coober Pedy, Australia- a scorching mining town where more than half the residents escape the desert heat by living underground in converted homes, churches, hotels, and shops carved into the earth. They. Live. Underground.
Of course, recreating opals in polymer clay turned out to be slightly easier said than done. My journey involved years on and off experimenting, tweaking, layering, and collecting enough failed attempts to build my own tiny polymer clay mountain range. Some samples were promising. Most were “creative learning experiences.”
My eureka moment happened when I stopped trying to imitate the appearance of an opal and zen-fully became one with the opal. Just kidding. I read books, and it turns out that Mother Nature is a brilliant little optical engineer. Natural opals begin their lives when water travels through cracks in sandstone, carrying tiny silica particles deep underground. As the water slowly evaporates, it leaves behind millions of microscopic silica spheres arranged in orderly layers. Those tiny structures act like a diffraction machine—capturing, bending, and bouncing light until the stone erupts with that famous shifting rainbow “play of color.”
By combining translucent polymer clay with simple materials that reflect and scatter light, I was able to recreate the illusion of an Australian opal’s glow, at least it’s really close. No mining equipment. No underground house.
Last September, I shared my faux opal adventure step-by-step with my polymer clay guild. Now, I’m bringing the experiment out my above ground clay room to share my own little piece of opal magic.
These easy faux opals were created with polymer clay, glitter, cellophane, and UV resin.
For the past month, my worktable has looked less like an artist’s studio and more like a geological laboratory. My mission? To create a convincing faux turquoise.
The journey wasn’t exactly a straight line. It took eight rounds of experimenting, tweaking, muttering and questioning my purpose in life before it finally clicked. The result is a technique I’m genuinely excited about. It lets you create turquoise with as much—or as little—matrix (those beautiful dark veins and inclusions) as you like. Better yet, you can customize the color to mimic everything from vivid Persian Blue to soft robin’s egg, rich teal, blue-green, or even the greenish hues found in other stones.
You’ll need a little patience. This isn’t an instant-gratification project. The process happens in two stages and includes drying time that can range from a few days to several weeks, depending on temperature and humidity.
The finest turquoise is an opaque, vibrant blue mineral that first became famous in the arid landscapes of Iran and Afghanistan. Those remarkable stones gave us the legendary color known as Persian Blue.
Skip this part if you’re not science-y: Natural turquoise begins when rainwater seeps through cracks in rock, dissolving minute amounts of copper along the way. As the water slowly evaporates, the copper reacts with aluminum and phosphorus to deposit teeny tiny layers of turquoise inside fractures in the host rock. Over millions of years, those deposits continue to build. Older turquoise often contains very little surrounding rock, while younger deposits retain more of the host stone, creating the intricate matrix patterns collectors love. If a little iron sneaks into the chemistry, the blue shifts toward green, producing another beautiful variety of turquoise.
One of the joys of making faux turquoise in polymer clay is we’re not limited by geology. Want dramatic black spiderweb matrix? Done. Prefer delicate veins with only a whisper of host rock? Okay. Love the sparkle of iron pyrite woven through the stone? Why not? And since we’re not waiting for mineral-rich groundwater to do the work over a few million years, we get to choose every shade, every inclusion, and every little detail ourselves.
If you’d like to create your own custom turquoise, complete with your favorite colors and matrix patterns, check out my Faux Turquoise Tutorial and start making gemstones that only look like they took eons to form.
Since April, the Northwest Polymer Clay Guild is meeting on Zoom. I had a space downstairs set up while I’m getting my clay studio ready. Here’s a few dining table creations…
I suppose these could be Seattle Sounders fan beads as well as Seahawk beads- slices of striped cane with metallics wrapped around scrap core, shaped on the ends and twisted for interest.Cane adapted from Meg Newberg’s cane tutorial at Polymer Clay Workshop……and what I made with some slices of it, along with a few tiny ornaments with my Folk Art obsession.Tiny vessel made from another Meg Newberg cane variationAnd yet another cane, a red tile with a translucent backgroundA little Folk Art redbird, simple and sweet
… over me. You’re singing it now, aren’t you? Scraping, sanding, spackling, sanding, priming, sanding, painting, cleaning… it’s finally finished! Hung new curtains, moved in a few things but like all new studio configuration, it’s subject to change to what works best. For the cat. She must look out every window and walk through every doorway… She say, “I know you and you know me” one thing I can tell you is you got to be free… haha, you’re welcome.